Purchase is an important feature of the distribution business. Purchase process on Rabbit Invest is a simple and easy process.
Browse & select funds, choose from SIP/ lumpsum, set a mandate, and complete purchases within one unified platform. Gain transparency and reduce delays with automated workflows. Keep every transaction organized and compliant.
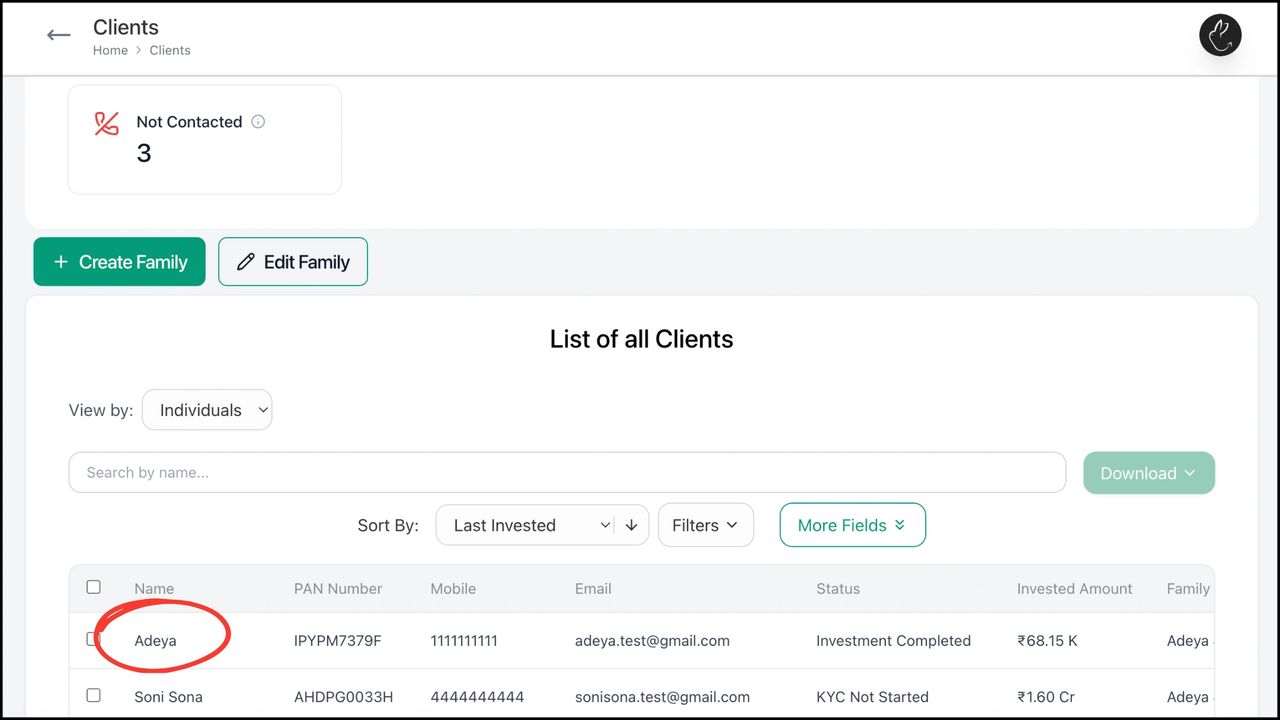
1. Click on Clients tab on your dashboard. Under ‘List of all Clients’, search/ click on the client for whom you want to make the purchase for
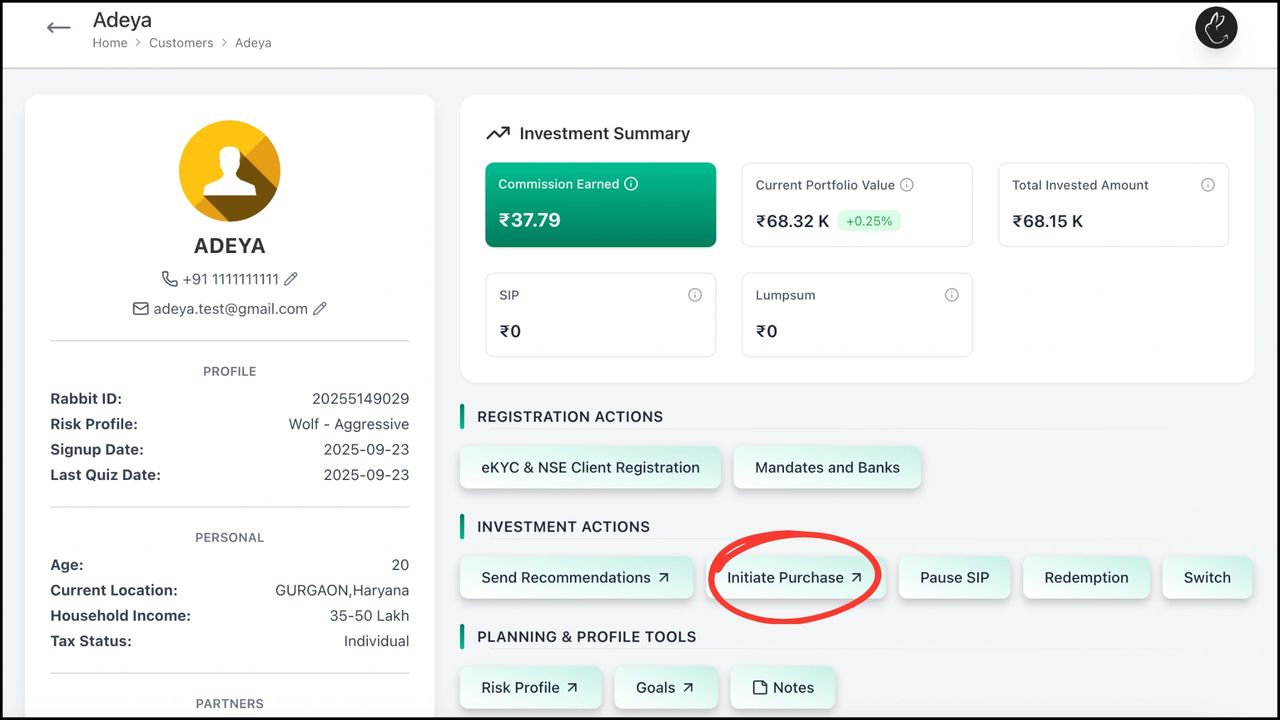
2. Click on ‘Initiate Purchase’
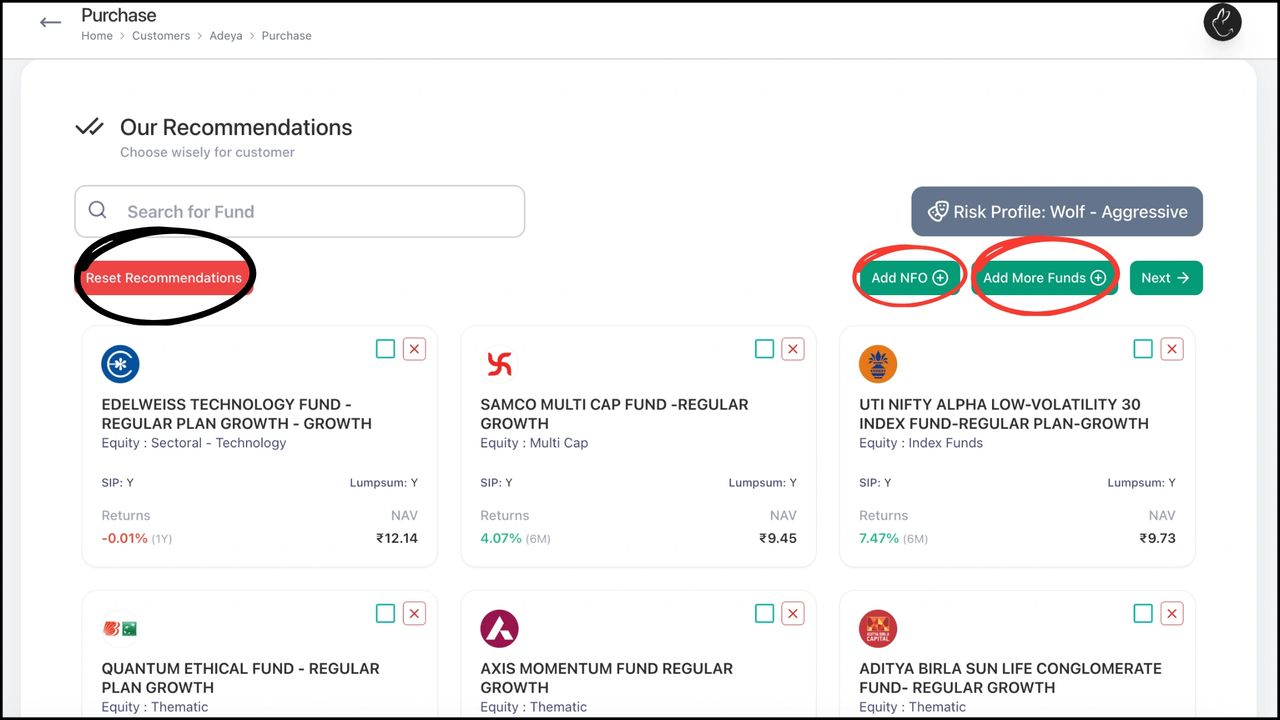
3. It redirects you to ‘Our Recommendations’. You now have to select fund (multiple selection allowed) that you want to purchase
How to select the fund? (You can also use a combination of these to select your funds)
- You can choose from default system-generated fund recommendations (recommended based on client’s risk profile). You can also ‘Reset Recommendations’ for new system-generated recommendations
- You can search for a particular fund in the search bar or you can click on ‘Add More Funds’ to browse funds of your choice
- You can add latest NFOs from ‘Add NFO’ button
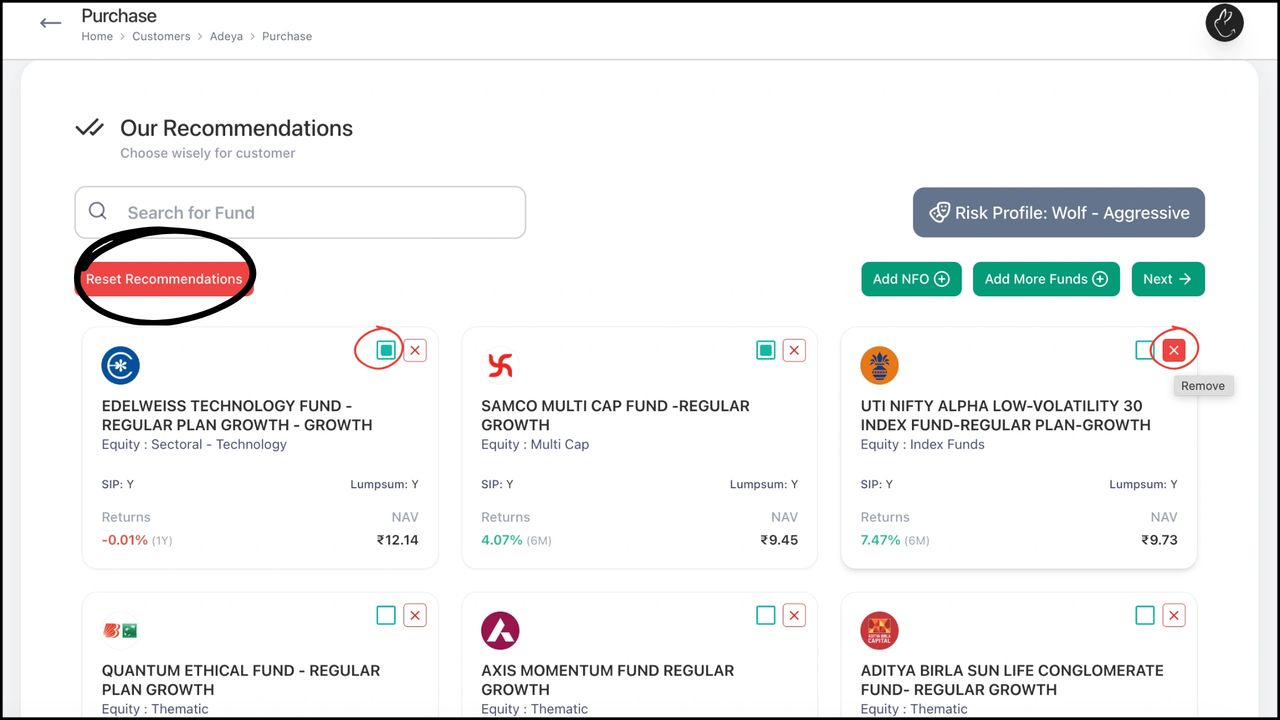
4. Choosing funds from system-generated recommendations
The funds that you see on ‘Our Recommendations’ page are system-generated recommendations. You can select funds by putting checks in the green box (indicates selection) or you can remove funds by clicking on the red cross (indicates deletion).
You can refresh these system-generated recommendations by clicking on ‘Reset Recommendations’. You will get new recommendations.
(Note: System-generated recommendations are based on client’s risk profile so these are unique to each client)
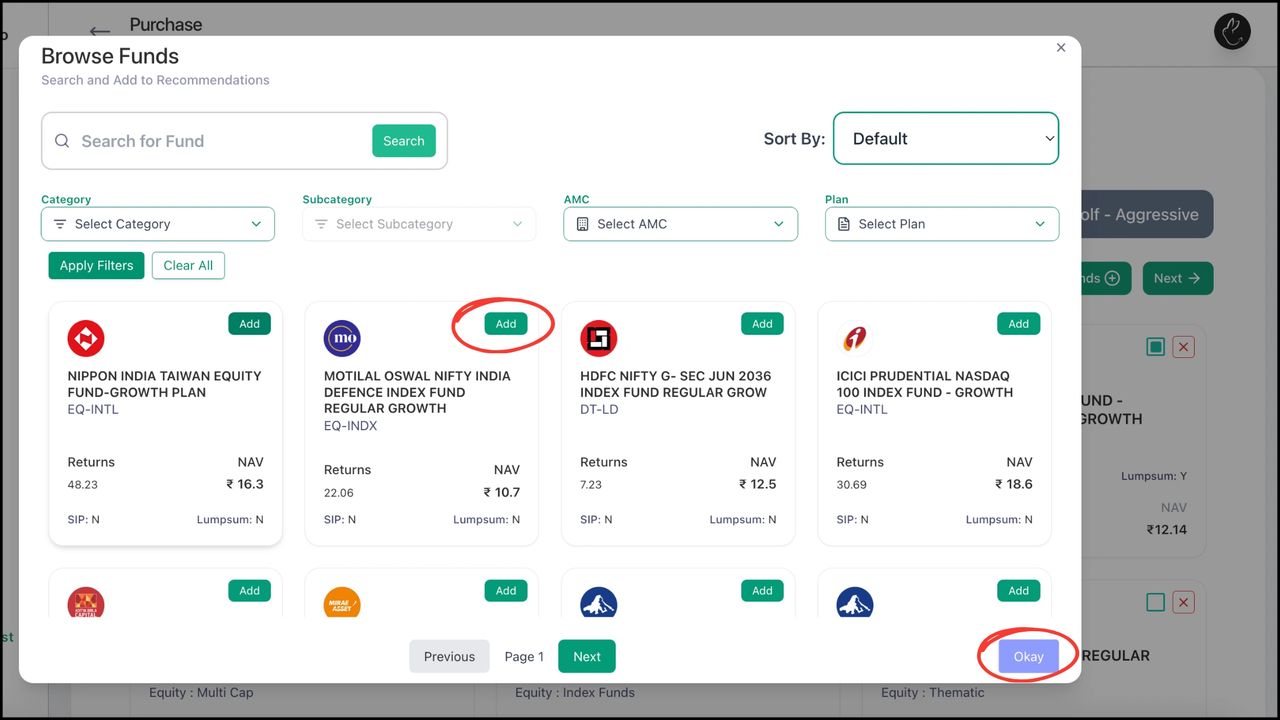
5. Choosing funds from ‘Add More Funds’
Click on Add More Funds, a popup window of ‘Browse Funds’ opens.
Use can either directly search a particular fund or use smart filters to narrow your search. Click on ‘Add’ to select the fund and press ‘Okay’.
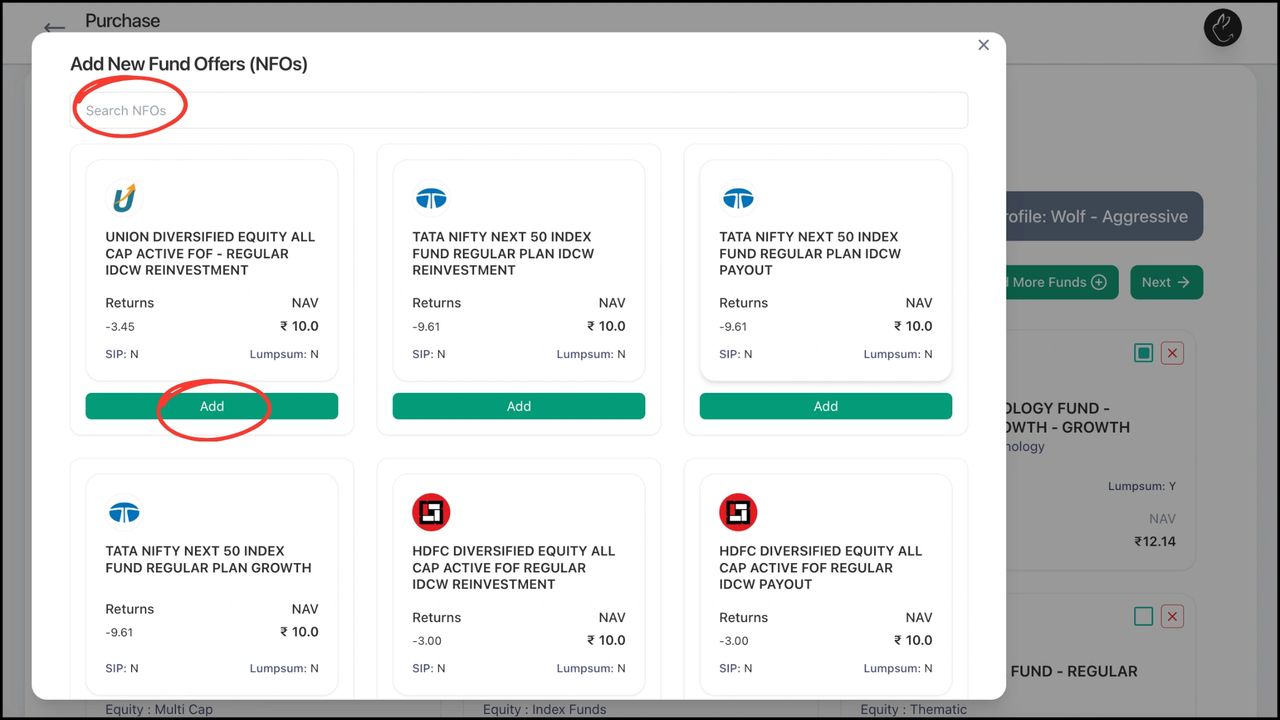
6. Choosing latest NFOs
Click on ‘Add NFOs’, a popup window will open.
You can search for latest live NFOs or select from the existing list of NFOs. Click on ‘Add’ to confirm selection.
7. Click on ‘Next’
8. You can see your selected funds. Choose from SIP/ One-time. Enter the total amount (it gets equally divided into the selected funds by default) or you can edit custom amount of your choice in each fund
.png/:/cr=t:0%25,l:0%25,w:100%25,h:100%25/rs=w:1280)
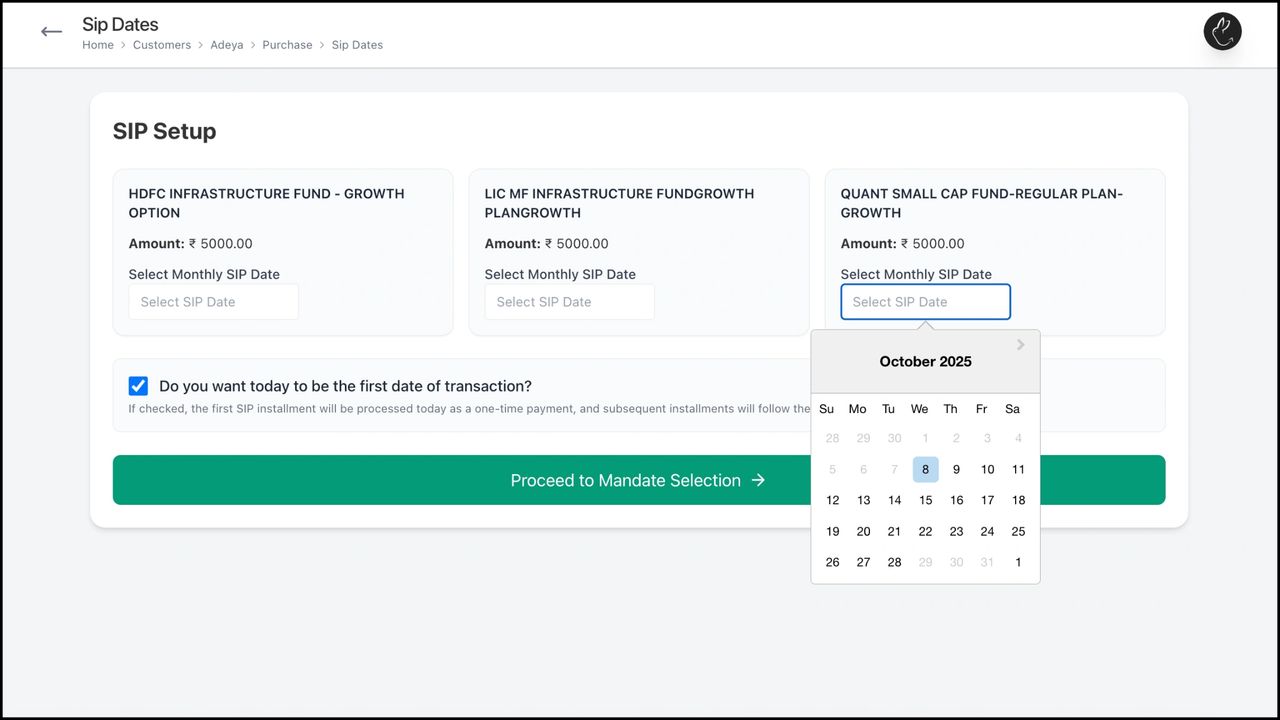
9. In case of SIP, you have to select the SIP date from the drop-down calendar, for each fund. Click on ‘Proceed to Mandate Section’
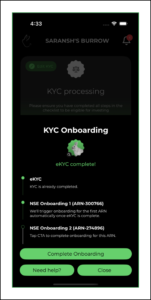
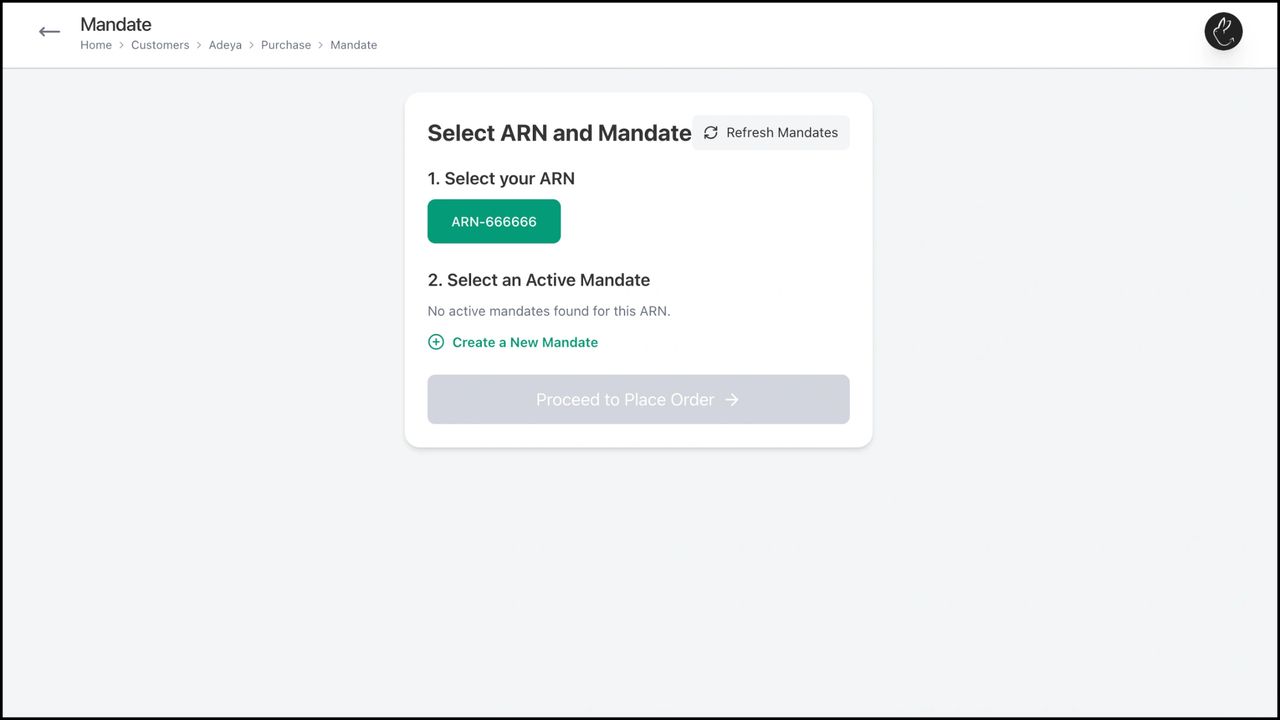
10. Select your ARN. If it is a new client, click on ‘Create a New Mandate’, if not, click on ‘Proceed to Place Order’
11. For creating a new mandate, select which bank account you would like to link from the drop-down menu and add the maximum mandate amount. Click on ‘Create & Approve’. Then click on ‘Place Order’
.png/:/cr=t:0%25,l:0%25,w:100%25,h:100%25/rs=w:1280)
12. In case of Onetime, select the ARN, confirm details, and click on ‘Place Order & Proceed to Payment’
.png/:/cr=t:0%25,l:0%25,w:100%25,h:100%25/rs=w:1280)